Graphics / Animation
Pieces of this lab are based on problems written by Dominique Thiebaut and Joseph O’Rourke at Smith College, and it was adapted for this course in June 2018 by R. Jordan Crouser, and updated by Alicia M. Grubb in Spring 2019/2020.
Repeat Warning
In order to be sucessful in computer science, an important skill that you must develop is understanding how to implement and develop a specification, and knowing when you can take liberty with the specification. You also need to distingush between implementing and developing a specification. In the course work for CSC111, we ask for some things very precisely. It is important that you read every word of lab and assignment descriptions. Misreading or ignoring directions will result in incorrect software/code.
In this lab, we’ll continue working with the graphics library available for download here
This time, we’ll also add in animation.
Step 1: Refresher
Recall from the lecture that we learned how to draw a circle using the graphics library?
from graphics import *
def main():
  win = GraphWin("My Circle", 600, 400)
  c = Circle(Point(50,50), 10)
  c.draw(win)
  win.getMouse() # Pause to view result
  win.close() # Close window when done
main()
If we wanted to make the circle move across the screen, we could call the .move() method inside a loop like this:
from graphics import *
import time
def main():
  win = GraphWin("My Circle", 600, 400, autoflush=False)
  c = Circle(Point(50,50), 10)
  c.setFill('red')
  c.draw(win)

  # move back and forth
  i=0
  dir=1 # 1: means moving right/down; -1 means moving left/up
  # run until there's a click in the window
  while not win.checkMouse():
    c.move(dir*3,dir*3) # move along a diagonal by about 3px.
    if i > 70:
      dir = -1*dir
      i = 0
    i += 1
    win.flush()
    time.sleep(0.05)
  win.close()
main()
Note: There are couple ugly things that must be done to make sure this animation displays nicely. Inside the while-loop we introduce a 5/100 sec pause to slow down the movement of the circle. We also have to tell the graphics when to repaint the window with the call to win.flush(). If the animation plays too quickly or slowly on your machine, try changing how long it sleeps.
Step 2: Classy graphics
Create a new file/document in Thonny and save it locally with the file name fish.py. Add the course header with the relevant information.
This is pretty cool, I guess… but would be way more fun to animate a more complex object like the cute little fish we drew in lecture:
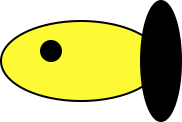
This little fish is made up of just two ovals and a circle. But as we discussed, it doesn’t seem quite right to draw each object independently. After all, they’re all part of the same object. And what if we wanted to move it around or draw more than one? This calls for a class!
Let’s recreate our simple Fish class, containing just __init__ and draw methods:
from graphics import *
import random
class Fish:
  """Definition for a fish with a body, eye, and tail"""
  def __init__(self, win, position):
    """constructs a fish made of 1 oval centered at `position`,
    a second oval for the tail, and a circle for the eye"""

    red = random.randint(0,255)
    green = random.randint(0,255)
    blue = random.randint(0,255)

    # body
    p1 = Point(position.getX()-40, position.getY()-20)
    p2 = Point(position.getX()+40, position.getY()+20)
    self.body = Oval( p1, p2 )
    self.body.setFill(color_rgb(red, green, blue))

    # tail
    p1 = Point(position.getX()+30, position.getY()-30)
    p2 = Point(position.getX()+50, position.getY()+30)
    self.tail = Oval( p1, p2 )
    self.tail.setFill( "black" )

    # eye
    center2 = Point( position.getX()-15, position.getY()-5 )
    self.eye = Circle( center2, 5 )
    self.eye.setFill( "black" )

  def draw( self, win ):
    """draw the fish to the window"""
    self.body.draw( win )
    self.tail.draw( win )
    self.eye.draw( win )
Add the above class to your lab file.
Step 3: Different Kinds of Fish
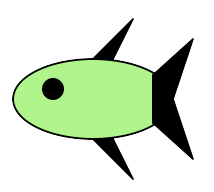
Extend the Fish class to create a few child classes to draw different kinds of fish. For example, you might consider using Polygon objects to give them some more exciting fin shapes, like this:
Step 4: Importing Fish
Create a new file/document in Thonny and save it locally with the file name lab8.py. Add the course header with the relevant information.
Then import the fish module, and write a main() method to draw a couple of fish to the screen. Boom! Your first aquarium!
Step 5: Swimming Fish
We know how to call the .move() method on a single object, but we’ll need to extend this method inside the Fish class in order to move the whole fish all together.
We’ll start by just having the fish swim in a straight line. Try adding this method to the Fish class inside your fish.py file:
def move( self , dx):
  """move the fish by dx"""
  self.body.move( dx, 0 )
  self.tail.move( dx, 0 )
  self.eye.move( dx, 0 )
Call the .move() method repeatedly on each of the fish you created in your lab8.py file to make them swim across the screen. Consider having fish that travel at different speeds to make it more interesting!
Lab Submission
- For this lab you need to submit your programs via Moodle. Go to our Moodle Page and submit your
Fish.py, andlab8.pyfiles.
Optional: Extra Fun
Many students enjoy working with fish and graphics and wish to create a more interesting aquarium. Take a look at the images on this page.
The images on this page are GIF files which the graphics package we are working with can display using the Image class (see the Zelle graphics documentation for more info). You will see a variety of fish swimming in both directions. At the bottom of the page you will see a nice aquarium image.
Using the Image class in the graphics package you can easily make your program look more like an aquarium.
Download the aquarium image to your directory. Note that is is called Tank2.gif and its size is 700 x 517. Here’s how you might create a window that has the aquarium:
from graphics import *
w = GraphWin('',700,517)
i = Image(Point(700/2, 517/2), 'Tank2.gif') #place the image in the middle of the window
i.draw(w)
You could then place your Fish objects “into” this tank by drawing them AFTER the tank has been drawn. Additionally, you can create Image objects using fish images that you download. Of particular interest, you will notice one fish (Fish0.gif) that is actually already animated so that it looks to be swimming. This is called an “animated GIF”. You can use this GIF file within an Image and place it in your tank and then move it forward using the animation techniques you have learned and you will have a very realistic swimming fish effect. Give it a try!
.